Monday, November 4, 2013

Dropzone Commander - PHR Painting Guide


I've had requests for more information on how I painted my Dropzone Commander Post-Human Republic vehicles. What follows is a detailed step-by-step guide following the assembly and painting of a pair of Apollo Type III Strike Walkers.

 Step 1a. First clean all the parts in warm soapy water - I find that I get a more consistent application of primer if I do this. Assemble the upper and lower chassis' with superglue. In the side slot on the upper chassis, drill a hole to add a magnet for mounting the weapon (either RX1-L Railgun for an Apollo-A or a RX-13 Manslayer for the Apollo-B). Drill a hole into the weapon to add the matching magnet. Fill the weapon mount slot with putty (I used Play Doh) so that it doesn't get clogged with paint during priming.

 Step 1b. Remove the post on the top of the lower chassis and glue a magnet in the same position to replace it. Drill out the underside upper chassis deep enough so that the matching magnet allows the upper chassis to sit at the correct height when mated.

 Step 2. Prime the parts. I used an old sprue with magnets glued to it as a painting stick for both the upper and lower chassis'. I primed the parts with Army Painter Skeleton Bone.

 Step 3. To remain consistent with my two tone colour scheme, I painted some panels on the upper and lower chassis' GW Ceramite White.

 Step 4. With a black Pixma brush pen, I painted in the individual "pore" dots on the upper and lower chassis. The vents and grills were carefully washed with GW Nuln Oil, then drybrushed Army Painter Skeleton Bone to re-highlight.

 Step 5. I then lined in all of the bone and white coloured panel seams with GW Reikland Fleshshade.

 Step 6. The metallic underside of the upper chassis, exposed backs of the legs and weapon barrels were painted with old GW Chainmail. The four engine exhausts were painted with Game Color Hammered Copper.

 Step 7. All of the previously painted Chainmail is then liberally washed with GW Nuln Oil. The Copper is washed with GW Agrax Earthshade. Allow a good hour or more to dry.

Step 8 and 9. The washed metal (Chainmail and Copper) is then dry-brushed with old GW Mithril Silver. The bone panels are highlighted with several applications of Army Painter Skeleton Bone slowing adding GW Ceramite White up to pure white points.

And finally shots of the Apollo walkers with final detailing. This includes painting the green, red and blue lens' (similar to the Eldar vehicles in this blog), and some simple decals denoting the fleet and vehicle registration.


Tuesday, October 22, 2013

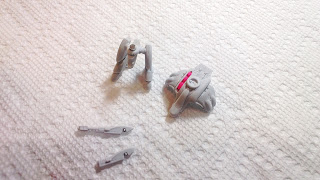
Hades Type IV Superheavy Walker ready for deployment

The forces of the Post Human Republics 7th Fleet have recently been bolstered by the arrival of a giant mecha-scorpion of awesomeness - the Hades Superheavy Walker!

An absolute joy to paint. Hopefully it plays just as well on the battlefield!


 For scale comparison.
The Hades alongside a Poseidon dropship, stand of Immortals  Infantry, and an Ares Type I Walker.


Before final assembly.
Turret complete, body still to be highlighted and the legs and feet waiting for wash and final highlights.

Monday, July 22, 2013

Eldar Wave Serpent Complete!

With the release of the new Eldar Codex for Warhammer 40,000, the unit that has the internet buzzing is the venerable Wave Serpent.

At the same time that I purchased my Hornet and Lynx from Forgeworld I also got the Type II upgrade kit for this model. Needless to say, much cleaning and reforming in hot water was required to get the (very few) additional resin parts to fit.

The Wave Serpent is based on the Falcon chassis, first released back in 1993! The sprues do show their age, needing a lot of flash clean-up, but the components still assemble very well.

I painted the tank chassis as 4 separate pieces, 3 of which are the underside. The top hull includes the Forgeworld resin rear "fin" preassembled (with a lot of Liquid Green Stuff). The sundry other pieces (weapons, turret, vanes, gems etc.) were also painted separately.

Here's what every part (including some that I didn't use) looked like fully painted, just prior to assembly.


Fresh from the Bonesingers, here then is Craftworld Thae Anor's shiny new Dedicated Troop Transport ready for action.
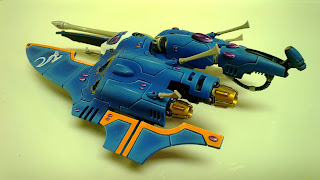


A group shot of the Craftworld's full armoured complement.


Soon (I hope) some Guardians will make an appearance...

Tuesday, June 11, 2013

Dropzone Commander - Battle Royale

This past Saturday, Bryan and I decided (once again) to wage war in the 27th millennium of Hawk Wargames 10mm Sci-fi universe.

Initially it was to be a simple 2 player Battle Royale (winner determined by the points value of the enemy models he has eliminated). But the game expanded to include Solomon's Scourge and Howard's fresh out of the packaging Shaltari. So we instead played a four corners, 1,200 points a player, all faction brawl. However this quickly degenerated into the UCM and PHR facing off (once again) on one side of the city and the two alien races meeting in the open plaza to exchange fire.

Here we see my Post-Human Republic task-force from the Heroic 7th Fleet getting in the face of Bryan's freshly painted ignorant fools... I mean United Colonies of Mankind army.


In the Purple corner we have the terrifying, parasitically controlled, bio-mechanical vehicles of the Scourge.


And in the final (colour-to-be-determined) corner we have the enigmatic Shaltari of an unknown Tribe.


 An overview of the early stages of conflict.

The building you see marked on the lower-right of the photo below is a vantage point, granting double-range for infantry units firing their weapons from it. As you can see it is currently occupied by 2 squads of UCM legionnaires. This was soon to change.


Due to Superior Covert Intelligence, (a fortunate command card draw) and consummate Dropship piloting skill (Bryan's legionnaires failing to damage my Triton light dropship as it deployed my Sirens) my PHR Immortals and Sirens gained entry to the building, slaying all but 7 (of 30) of the hapless UCM troops. Moments later a Shaltari Spirit Gate appeared outside and 6 Firstborn joined the melee.


Which was great because: A) The UCM troops got wiped out, B) We figured out how to fight a three-way close quarters combat, and C) We now know precisely how much to fear and respect Shaltari elite troops (a heck of a lot!).

By the end of the battle the bulk of the Scourge forces were just microwaved smears on the pavement, and the UCM Captain had decided after losing half his force to withering rail-gun fire that discretion was the better part of valour and vacated the city.

The PHR and Shaltari split the spoils and called it a day, leaving the littered battle-field in search of future glory!

Eldar Lynx - Complete!

...well almost. I still have the "tattoo" to paint on the right-side front panels, but other than that it's done.


Friday, June 7, 2013

Eldar Lynx - Work in Progress

This stunning model and the equally excellent Hornet, were the primary catalyst in getting me back into the world of table-top Warhammer 40,000.

However, if I'd known prior to purchasing these kits how "challenging" they would be to assemble I may not have been so eager! Be prepared to spend a significant amount of time straightening the resin pieces and locating and filling bubbles and pits with Green Stuff. All that said, the extra time spent in prep does provide a great incentive to put in some extra effort on the paint-job as well.

Shall we begin?

First up we have the Lynx model already well under way.

The Pulsar Cannon (and associated accelerator/power converter on the rear) are fully painted. These two parts are magnetized, so that I could in theory change the cannon for the Sonic Lance. In reality I did it so I can bump the weapon during play and not worry about it breaking off!

The basic armour panel blue is Army Painter Crystal Blue Primer, air-brushed with the old GW Regal Blue to shade, air-brushed back up to the base colour with GW Teclis Blue then further highlighted by air-brush with GW Lothern Blue.
The undersides and engine components have been painted GW Chaos Black.
The recesses between the Blue panels are painted GW Regal Blue.
The small panels around the engine intakes have been painted GW Scorched Brown.


Next I start work on the engine intakes.

The raised grill is painted with GW Shadow Grey, then worked up to GW Space Wolf Grey to almost a pure GW Ceramite White in the centre. This is the same painting sequence used for highlighting the underside of the tank and the black engine detail.
The engine panels are based with GW Balthasar Gold, then GW Shining Gold; worked up to GW Mithril Silver as a final highlight.


The blinding orange trim has been added in GW Troll Slayer Orange, over a base of GW Ceramite White to make the orange "pop" as much as possible.
Also the canopy hinge and vent (to the side and top of the canopy respectively) have been painted in GW Chainmail then washed with GW Nuln Oil and re-highlighted with GW Chainmail.


A lot of detail gets added in this next stage.

Assuming a light source directly above and slightly forward of the tank the panels are all edge highlighted with GW Lothern Blue up to GW Space Wolf Grey and then a final highlight with a 1:1 mix of GW Space Wolf Grey and GW Ceramite White.
The gems / souls stones and the canopy are also completed*.


Soon my shiny new Super-heavy Eldar Lynx Grav-tank will be ready for the battlefield! Pictures of the (nearly) completed vehicle to be posted soon.

* I'll make a separate post on the painting sequence I use for the Purple and Red gems.

Eldar Hornet - Complete

Introducing the first of the War Machines of Craftworld Thae Anor. The Forgeworld Hornet.

The basic colour palette for my Eldar force is:

Primary Colour - GW Teclis Blue, which is almost a perfect match for Army Painter Crystal Blue. I use the Army Painter coloured spray primers on most of my models.

Secondary Colours - GW Ceramite White and GW Troll Slayer Orange. The orange is partially translucent and is affected by the colour beneath it. Because of this all of the orange areas are based with Ceramite White prior to applying orange. The Ceramite White has excellent coverage, so at most needs only three thin coats over the Crystal Blue.

Tertiary Colours - GW Chaos Black, GW Dheneb Stone, and GW Shining Gold. Chaos Black is reserved for "hidden" mechanisms, such as the linkages between wraithbone parts and the underside of vehicles. The Dheneb Stone represents raw Wraithbone - typically used on all the armies weapons. The Shining Gold is used as an accent colour on the engine intake and exhaust, and some other elements like runes and gem sockets.

Spot Colours - GW Liche Purple + GW Warlock Purple (1:1 mix), and Mephiston Red. Reserved for the (numerous!) gems and also the vehicle canopies. The purple mix is used most (about 90%) of the time.


Another Forgeworld Construct (with work-in-progress images) to follow soon...

Thursday, May 9, 2013