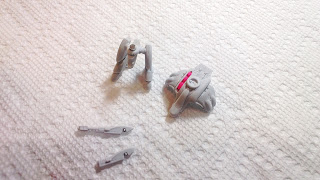
I've had requests for more information on how I painted my Dropzone Commander Post-Human Republic vehicles. What follows is a detailed step-by-step guide following the assembly and painting of a pair of Apollo Type III Strike Walkers.
Step 1a. First clean all the parts in warm soapy water - I find that I get a more consistent application of primer if I do this. Assemble the upper and lower chassis' with superglue. In the side slot on the upper chassis, drill a hole to add a magnet for mounting the weapon (either RX1-L Railgun for an Apollo-A or a RX-13 Manslayer for the Apollo-B). Drill a hole into the weapon to add the matching magnet. Fill the weapon mount slot with putty (I used Play Doh) so that it doesn't get clogged with paint during priming.
Step 1b. Remove the post on the top of the lower chassis and glue a magnet in the same position to replace it. Drill out the underside upper chassis deep enough so that the matching magnet allows the upper chassis to sit at the correct height when mated.
Step 2. Prime the parts. I used an old sprue with magnets glued to it as a painting stick for both the upper and lower chassis'. I primed the parts with Army Painter Skeleton Bone.
Step 3. To remain consistent with my two tone colour scheme, I painted some panels on the upper and lower chassis' GW Ceramite White.
Step 4. With a black Pixma brush pen, I painted in the individual "pore" dots on the upper and lower chassis. The vents and grills were carefully washed with GW Nuln Oil, then drybrushed Army Painter Skeleton Bone to re-highlight.
Step 5. I then lined in all of the bone and white coloured panel seams with GW Reikland Fleshshade.
Step 6. The metallic underside of the upper chassis, exposed backs of the legs and weapon barrels were painted with old GW Chainmail. The four engine exhausts were painted with Game Color Hammered Copper.
Step 7. All of the previously painted Chainmail is then liberally washed with GW Nuln Oil. The Copper is washed with GW Agrax Earthshade. Allow a good hour or more to dry.
And finally shots of the Apollo walkers with final detailing. This includes painting the green, red and blue lens' (similar to the Eldar vehicles in this blog), and some simple decals denoting the fleet and vehicle registration.


I realize it's months later, but this is a great post -- I love the color scheme you picked. I'm thinking of using a variant of it for my own PHR army.
ReplyDeleteWhere did you find those number ID decals?
Hi There,
ReplyDeleteI only just noticed your question regarding the decals.
The decals are from some old 1/3900 scale Star Trek Federation miniatures (hence the proliferation of "1"'s and "7"'s on my PHR :) ) that I purchased a few years ago from Pomroy Productions. Unfortunately they stopped supplying decals in 2011.
The font used is Microstyle Extended (which I believe is the same font Hawk uses). You may be able to track down some transfers in this font elsewhere online.
Sorry I couldn't of more help.